



Set Up PowerBI Robots in Under 10 Minutes: The New Onboarding Walkthrough
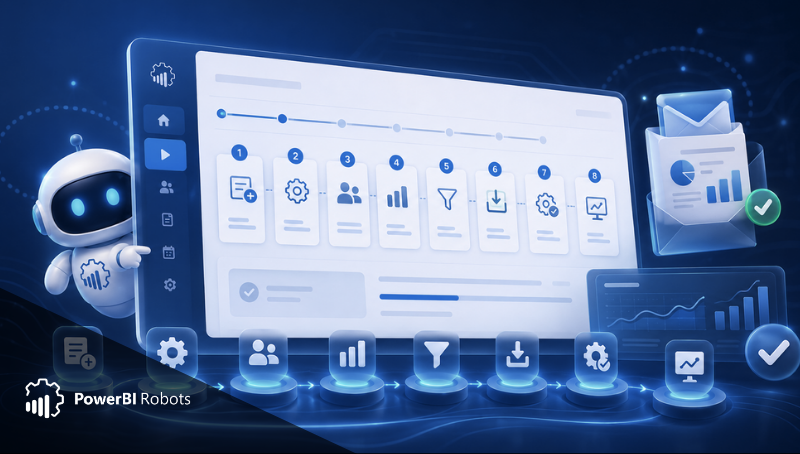
Table of Contents
Getting started with report automation should not feel like guesswork.
The new PowerBI Robots onboarding was created to help new users understand the platform faster and complete their first setup with more confidence. Instead of opening the product and trying to discover where everything is, users are guided through the main steps needed to create and run their first playlist.
The onboarding focuses on the core workflow: create a playlist, configure it, add recipients, add reports, filter report information by recipient, install the PowerBI Robots Agent, configure the Agent, and view the execution of a playlist.
By the end of the walkthrough, users should understand the main building blocks of PowerBI Robots and how they work together.
What the new PowerBI Robots onboarding is designed to do
PowerBI Robots includes several options for automating Power BI report delivery, but new users usually need to answer a few practical questions first.
Where do I create my first automation? How do I choose which reports to send? How do I add recipients? How do I make sure each recipient gets the right information? Why do I need the PowerBI Robots Agent? How do I know whether the automation actually ran?
The new onboarding answers these questions through a guided flow.
Instead of introducing every option at once, it focuses on the essential setup path. This helps users reach their first successful execution faster and understand the logic of the platform as they go.
Step 1: Create a playlist
The first step is to create a playlist.
In PowerBI Robots, a playlist is the structure that brings together the reports, recipients, filters, schedule, and execution settings for an automated delivery.
A playlist can represent a weekly sales report, a monthly executive summary, a customer-specific report pack, or a daily operational dashboard.
The onboarding starts here because playlists are the foundation of the product. Once users understand what a playlist is, the rest of the setup becomes easier to follow.

Step 2: Configure the playlist
After creating the playlist, users configure it.
This is where they define how the automation should behave. Playlist configuration can include delivery settings, output preferences, and other options that control the report automation process.
For example, a playlist created for internal management reporting may need different settings from one created for customer-facing report delivery.
This step gives users the context they need before adding recipients and reports.

Step 3: Add recipients
Recipients are the people or groups who will receive the report delivery.
This is where report automation starts to save time immediately. Instead of manually exporting reports and sending emails one by one, PowerBI Robots can deliver report snapshots automatically to the right audience.
The onboarding introduces recipient management early because it is central to most automation scenarios.
It is also a good moment to check email addresses, groups, and naming conventions. Clean recipient setup helps avoid delivery mistakes later.


Step 4: Add reports
After recipients are added, users select the reports that will be included in the playlist.
This step connects PowerBI Robots to the Power BI content users want to distribute. The selected reports define what recipients will receive when the playlist runs.
For new users, this is one of the most important parts of the onboarding flow. It makes the connection between the reports they already use and the automation process they are creating.


Step 5: Filter report information by recipient
Not every recipient should receive the same report view.
A sales manager may only need data for their region. A customer may only need information related to their account. A department lead may only need the metrics for their team.
PowerBI Robots supports this by allowing report information to be filtered by recipient in the playlist.
With the right filters, a single playlist can support different audiences while reducing manual work.


Step 6 and 7: Install and configure the PowerBI Robots Agent
The PowerBI Robots Agent is part of the execution process.
The onboarding includes both installation and configuration because this is a common point where new users need guidance. If the Agent is not installed or configured correctly, users may complete the playlist setup but still be unable to run the automation successfully.
By placing these steps inside the onboarding flow, PowerBI Robots makes the setup more complete. Users first define what they want to send, then prepare the component required to execute that delivery.


Step 8: View the execution of a playlist
The final step is to view a playlist execution.
This closes the loop. Users do not just create an automation; they also learn how to confirm that it ran.
The execution view helps users check whether the playlist was triggered, whether delivery was completed, and whether any issue needs attention.
A successful first execution builds confidence and shows how the different parts of PowerBI Robots work together.


Final thoughts
The new PowerBI Robots onboarding is designed to help users learn by doing.
It guides them through the eight steps that matter most: creating a playlist, configuring it, adding recipients, adding reports, filtering report information by recipient, installing the Agent, configuring the Agent, and reviewing execution.
For new users, this makes the first setup clearer. For teams starting a trial, it helps reduce uncertainty and makes the product easier to evaluate.
Start a PowerBI Robots trial and use the new onboarding to automate your first Power BI report delivery.
You can also read the full launch overview: PowerBI Robots Just Got Smarter: New Interface, Onboarding, and AI Summaries.

Share this post: